PHPでTwitter APIを使ってみる
デベロッパーアカウントの作り方はこちら
まずはプロジェクト名。


こちらの記事を参考にしています。
SSLのエラーが出る場合は「CURLOPT_SSL_VERIFYPEER」をfalseに修正します。
「

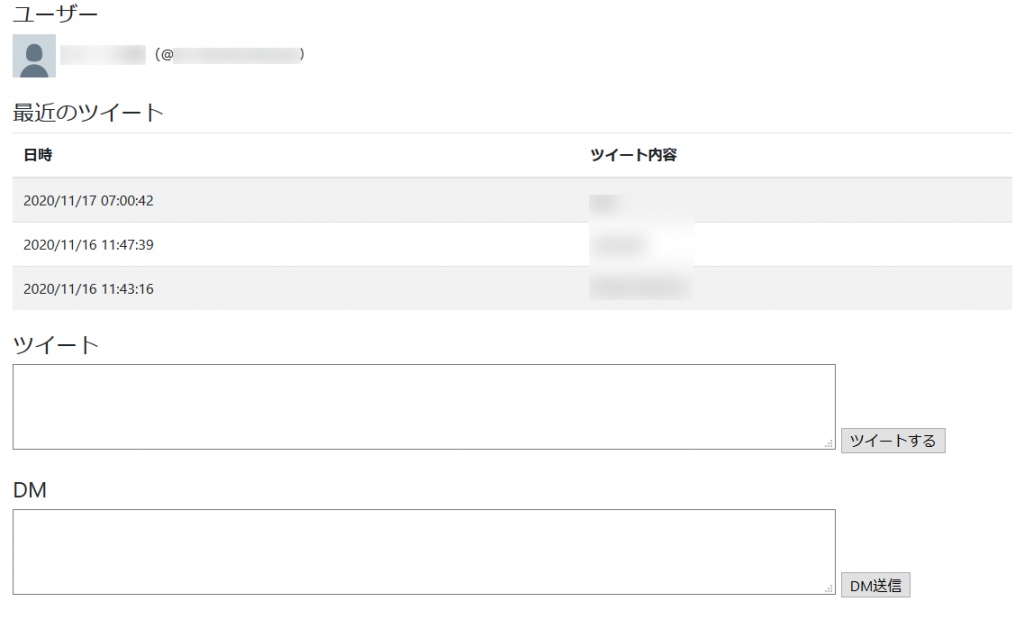
APIを使ってログイン、アカウント情報の取得、ツイートの取得・送信、DMが送信できます。
プロジェクトとアプリの作成
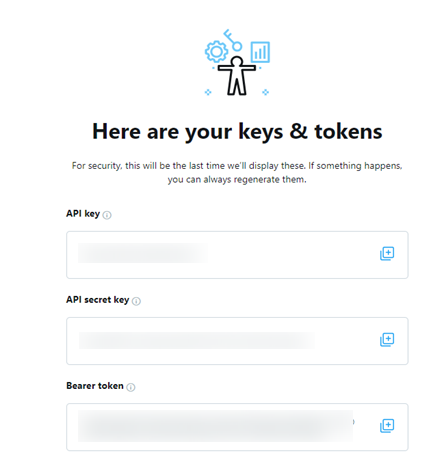
APIキーを取得するためにプロジェクトとアプリを作成します。まずはプロジェクト名。


プログラムの作成
APIを使うプログラムをPHPで書いていきます。こちらの記事を参考にしています。
ライブラリのインストール
TwitterOAuthをインストールします。>composer require abraham/twitteroauth:^1.2.0 /**
* Set Curl options.
*
* @return array
*/
private function curlOptions(): array
{
$bundlePath = CaBundle::getSystemCaRootBundlePath();
$options = [
// CURLOPT_VERBOSE => true,
CURLOPT_CONNECTTIMEOUT => $this->connectionTimeout,
CURLOPT_HEADER => true,
CURLOPT_RETURNTRANSFER => true,
CURLOPT_SSL_VERIFYHOST => 2,
CURLOPT_SSL_VERIFYPEER => false,
CURLOPT_TIMEOUT => $this->timeout,
CURLOPT_USERAGENT => $this->userAgent,
$this->curlCaOpt($bundlePath) => $bundlePath,
];プログラムの作成
Twiterログイン認証画面にリダイレクト、ログイン完了後のコールバック、ログイン後の処理という形でプログラムを用意します。<?php
session_start();
require_once 'vendor/autoload.php';
use Abraham\TwitterOAuth\TwitterOAuth;
const CONSUMER_KEY = '*******************'; // API key
const CONSUMER_SECRET = '*****************************************'; // API key secret
const OAUTH_CALLBACK = 'http://localhost/callback.php';
$connection = new TwitterOAuth(CONSUMER_KEY, CONSUMER_SECRET);
$request_token = $connection->oauth('oauth/request_token', ['oauth_callback' => OAUTH_CALLBACK]);
// callback.php で利用する
$_SESSION['oauth_token'] = $request_token['oauth_token'];
$_SESSION['oauth_token_secret'] = $request_token['oauth_token_secret'];
$_SESSION['consumer_key'] = CONSUMER_KEY;
$_SESSION['consumer_secret'] = CONSUMER_SECRET;
// twitter.com上の認証画面のURLを取得してリダイレクト
$url = $connection->url('oauth/authenticate', ['oauth_token' => $request_token['oauth_token']]);
header('location: '. $url);<?php
session_start();
require_once 'vendor/autoload.php';
use Abraham\TwitterOAuth\TwitterOAuth;
// Twitterから返されたOAuthトークンの検証
if (isset($_REQUEST['oauth_token']) && $_SESSION['oauth_token'] !== $_REQUEST['oauth_token']) {
die('OAuth token invalid');
}
// OAuthトークンも用いてTwitterOAuthをインスタンス化
$connection = new TwitterOAuth($_SESSION['consumer_key'], $_SESSION['consumer_secret'], $_SESSION['oauth_token'], $_SESSION['oauth_token_secret']);
// アクセストークンの取得
$_SESSION['access_token'] = $connection->oauth("oauth/access_token", ["oauth_verifier" => $_REQUEST['oauth_verifier']]);
session_regenerate_id();
header('location: /app.php');<?php
session_start();
require_once 'vendor/autoload.php';
use Abraham\TwitterOAuth\TwitterOAuth;
// アクセストークンを取得
$access_token = $_SESSION['access_token'];
$connection = new TwitterOAuth($_SESSION['consumer_key'], $_SESSION['consumer_secret'], $access_token['oauth_token'], $access_token['oauth_token_secret']);
//ユーザー情報取得
$user = $connection->get('account/verify_credentials');
if(!empty($_POST)){
if(isset($_POST['tweet'])){
// ツイートする
$tweet = $_POST['tweet'];
$connection->post('statuses/update', ['status' => $tweet]);
}elseif(isset($_POST['dm'])){
// DMする
$message = $_POST['dm'];
$result = $connection->post('direct_messages/events/new', [
'event' => [
'type' => 'message_create',
'message_create' => [
'target' => [
'recipient_id' => $user->id,
],
'message_data' => [
'text' => $message,
]
]
]
], true);
}
}
// タイムラインを取得
$timeline = $connection->get('statuses/user_timeline', ['count' => 3]);
?>
<!DOCTYPE html>
<html lang="ja">
<head>
<meta charset="utf-8">
<!-- Bootstrap CSS -->
<link rel="stylesheet" href="https://stackpath.bootstrapcdn.com/bootstrap/4.3.1/css/bootstrap.min.css" integrity="sha384-ggOyR0iXCbMQv3Xipma34MD+dH/1fQ784/j6cY/iJTQUOhcWr7x9JvoRxT2MZw1T" crossorigin="anonymous">
<title>Twitter App</title>
</head>
<body>
<div class="container mt-4 mb-4">
<h4>ユーザー</h4>
<div class="row">
<div class="col-sm-8">
<img src="<?=$user->profile_image_url_https?>">
<span><?=$user->name?>(@<?=$user->screen_name?>)</span>
</div>
</div>
</div>
<div class="container mb-4">
<h4>最近のツイート</h4>
<table class="table table-striped">
<thead>
<tr>
<th>日時</th>
<th>ツイート内容</th>
</tr>
</thead>
<tbody>
<?php foreach($timeline as $tweet):?>
<tr>
<td><?=date('Y/m/d H:i:s', strtotime($tweet->created_at))?></td>
<td><?=$tweet->text?></td>
</tr>
<?php endforeach;?>
</tbody>
</table>
</div>
<div class="container mb-4">
<h4>ツイート</h4>
<form action="/app.php" method="post">
<textarea rows="3" cols="100" name="tweet"></textarea>
<input type="submit" value="ツイートする"/>
</form>
</div>
<div class="container">
<h4>DM</h4>
<form action="/app.php" method="post">
<textarea rows="3" cols="100" name="dm"></textarea>
<input type="submit" value="DM送信"/>
</form>
</div>
</body>
</html>
php -S localhost:80 -t .」でビルトインサーバーを起動して「http://localhost/login.php」にアクセスして実行します。
APIを使ってログイン、アカウント情報の取得、ツイートの取得・送信、DMが送信できます。


ディスカッション
コメント一覧
まだ、コメントがありません